Home >
MR2
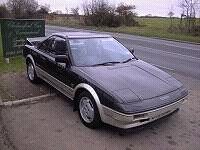
Toyota MR2 Mark 1 Buyer's Guide
Introduction
 This buyer's guide is intended to help the potential purchaser of a Toyota MR2 Mark 1 thoroughly check out any vehicles he chooses to look over
and test drive. This guide concentrates on the specifics of checking a
MR2 Mark 1. if you require general information on checking used cars, check out
this guide from Autotrader, and also
this section of the Which? website for information on
the legal aspects of buying a car and how to reduce the risks.
This buyer's guide is intended to help the potential purchaser of a Toyota MR2 Mark 1 thoroughly check out any vehicles he chooses to look over
and test drive. This guide concentrates on the specifics of checking a
MR2 Mark 1. if you require general information on checking used cars, check out
this guide from Autotrader, and also
this section of the Which? website for information on
the legal aspects of buying a car and how to reduce the risks.
If you have any additions or corrections to make to the text below, please mail me at
nick@challoner.com.
This guide is for information only. Although every care has been taken to produce an accurate and comprehensive guide, I cannot be
held legally responsible for any direct or indirect loss due to its use. Use of this guide indicates your understanding of these conditions.
Basically, I have produced this to try and help people - please use it in that spirit.
This page has a UK bias as that is where I live and where I checked over cars.
Mk1 MR2s are pretty similar the world over though, so most of what is written below should be applicable wherever
you live. Where I refer to left and right, I mean left and right as though you are sitting in the car looking forward (so
in the UK left is the nearside and right is the offside).
General
- Remember there are essentially three types of Mk1 MR2 available in the UK: early normally-aspirated cars (1985-1987) sold in the UK, late
normally-aspirated cars (1987-1989) sold in the UK, and supercharged models sold in Japan and imported second-hand into the UK. The
later cars have various minor revisions, mostly for the better (particular the brakes which are prone to warping on the early cars),
but sometimes for the worse (the earlier ECU has much better mapping resulting in better performance).
The superchargers are comparitively rare and are usually identified externally by supercharger decals on the doors and bootlid, and
raised grilles on the engine bay lid. Some owners have transplanted supercharger engines into their
normally aspirated cars, some have even transplanted
turbocharged 3S-GTE engines from the Mk2 MR2 turbo into them!
- A full service history is obviously desirable, but not essential - remember that any car of this age is unlikely to have a full service
history. The service interval is 5,000 miles for the early cars, upped to 6,000
miles for later cars.
- A big handful of receipts for service and parts is always a good sign that the car has been well cared for.
- Another good sign of a well looked after car is the presence of the toolkit. Open the front boot and look for it next to the jack on
the right hand side of the car (left side as you look in from the front).
- Check the tyres. Any wear should be even, except for perhaps wear on the insides of the rears. Make sure you negotiate something
off the asking price if some or all of the tyres are worn!
Electrical
- Check the operation of both electric windows. Make sure the passenger side isolator switch (labelled
"Window Lock") is in the up position -
many an owner has thought the passenger window has a fault when this switch has been accidentally
activated! A common problem is jerky operation
of the window which is due to teeth being stripped from the cogs in the mechanism. Toyota will only supply a complete new mechanism which
costs in excess of £100. Fortunately Twos R Us in the USA can supply a new cog
for approximately
$30 including international shipping. Another problem is burning out of the switches for the passenger side window. There is no relay
for this circuit and so the switches take the full current drawn by the motor. Be sure to check both (driver's side and passenger's side)
operate the window successfully. The switch for the driver's window should wind the window down automatically if pressed beyond it's normal
operating position.
- The heater fan
speed control can be a problem, so select each position and make sure the fan speed changes accordingly. If one or more selections fail
to change the fan speed, or the fan stops at certain selections, then the resistor pack has probably failed. This is fairly cheap to
replace, and is easily accessible behind the glove compartment.
- The early Mk1 MR2 has a kind of central locking, in that there is a switch on the drivers door forward of the electric window switches
which will lock and unlock both doors simultaneously. However, using the key in a door lock will only operate the lock for that door.
Strange but true - it is not a fault! Later cars have full central locking in that the door key does
operate the locks on both sides. The door locking switch on the driver's door switch panel should also lock and unlock both doors on all
models.
Similarly, cars with aftermarket alarms including a remote locking feature should lock and unlock both doors from the remote.
- Post-1987 models have an electric aerial - make sure it works because it often doesn't! A replacement from Toyota is in excess of
£100. Many owners have used a generic electric aerial from a motor spares supplier (e.g. Halfords in the UK) for much less,
the only problem being working out the wiring.
- Check for sloppiness in the windscreen wiper linkage - this is caused by a plastic bush, but the whole assembly has to be
replaced and it costs over £100!
- The original stereo has fiddly balance/fade controls. If one or more
speakers appear faulty, adjust the inner 'ring' of the volume
wheel until it clicks into the 'middle' position, then pull the whole
volume knob out about 4mm and repeat. This sets both the balance and fade to middle. The fade does not apply to early models which only
have front speakers.
Bodywork
- The nosecone of the car is held on with a metal strip underneath it which is itself held on by a series of bolts. If all these bolts
are corroded it is a good sign because the bumper and trim have probably
not been replaced, and therefore the front of the vehicle has not hit anything!
- Behind the nosecone is a strong steel crossmember. This often corrodes badly, and is an MOT failure in the UK. Unless it has been
replaced already it will almost certainly be corroded. You can attempt to check is visually from above (remove the plastic cover
above the radiator between the headlamps if still fitted) and from below (shine a torch through the radiator grill and look for
flakes of corroded metal - although these could also come from the radiator or headlamp frames).
An easy check is to squeeze and wiggle the narrow sections of nosecone above
and below the sidelight/indicator clusters - if you can feel and hear it crunching then the crossmember is corroded.
- While under the nose, check that the bodywork is not corroded badly in this area. If it is, then it may mean that the vehicle
has been incorrectly jacked causing damage.
- With the front boot still open, look up and check the metal ring that latches onto the bonnet release mechanism. The paint on it
should have worn off, and perhaps it may even be corroded slightly, indicating that the bonnet has been in place for some time, not
a recent collision damage replacement.
- Now look down at the area between the headlights, remove the plastic cover if it is fitted and you haven't already done so.
Check that any corrosion on
and around the top of the radiator is surface only, not crumbly and deep. While you are in the area (and with the ignition switched
off to protect your fingers!) spin the two radiator fans to make sure they are not seized.
- Remove the spare wheel and anything else in the front boot. Remove the plastic front boot liner by pressing
in the two clips that hold it in place (one on each side, mid way up). Do this by pressing in the centre sections with a pen or similar
and then pulling them out - be careful not to break them! Then check all exposed bodywork for corrosion.
Check the heater piping, and clutch and brake master cylinders and piping for leaks while you are here.
- Pull up the rubber lining of the front boot and check for corrosion. The front boot seal can leak causing water to accumulate down here.
Make sure the boot floor is not buckled indicating accident damage.
- The headlights are also prone to corrosion. Lock them up by switching the headlights on, then pushing the headlight switch into
the dashboard and turning it one more stop counter-clockwise. Now undo the plastic covers either side of the headlamps by unscrewing
the two bright screws that hold each cover on. Any corrosion should be surface corrosion only. Check the pivots at the back too for
serious corrosion or you could be left with a lop-sided light on a dark and rainy night in the middle of nowhere!
- Check along the front of the roof for corrosion where the windscreen meets it. Windscreen replacement often results in damage to
the bodywork the windscreen bonds to, which leads to corrosion over time. Fixing this can be expensive because the windscreen
will need to be removed and will often break in the process because it is bonded in place. If the windscreen is already cracked
it could be an indication of hidden corrosion placing localised pressure on it.
- If the car is a sunroof model check for corrosion due to
blocked drain tubes. From inside the car, note that there is about an inch
of metal showing (painted black or blue) between the far edge of the plastic
dashboard and the lower edge of the windscreen. Look for obvious corrosion
at either end. Grasp the plastic interior a-pillar trim and gently but
firmly twist. Listen for rust flakes dropping as you do this. Probably best to walk away from
a car that fails this test!
- Open both doors fully. Place your hand under the outer edge of each and pull upwards. There should be very little and preferably
no vertical movement of the doors. If there is more than 5mm then the door mountings are very worn, be sure to check the doors
close properly without scraping the body of the car.
- With the doors still open, check the body of the car at the point where the B-pillars (pillars at the rear of the door) meet the
sill (the horizontal piece running along the bottom of the body between the wheel arches). This is a very common place to corrode,
and can be costly to repair (my 1985 model had a receipt with it from a Toyota dealer who had carried out this work in August 1999
for £485.00), so be sure to negotiate a lower price to reflect this! The MoT man does not like this either, due to the close
proximity of suspension mountings. Ideally you will need to remove the black plastic triangles at the rear of the sill (early
models) or the rear part of the side skirts (late models) to view this section of bodywork. That probably won't be possible
during an inspection, so do your best to check the lower edge of the sills, inside the wheel arches and where the B-pillars join the sills.
You can also grasp the black triangle/rear sideskirt section and attempt to twist it - if there is any movement or it feels "crunchy"
then the metal behind it is corroded.
- The point where the A-pillars (pillars between door and windscreen/front wing) meet the sill can also corrode due to leaves and
debris building up behind the front wheel-arch liners. Open the doors and check the area around and below the hinges for any
signs of corrosion.
- Check all wheel arches for corrosion. This is a very common problem and again can be quite expensive to fix properly so be sure
to negotiate a reduction. Most Mk1s regularly driven in the UK are probably going to be suffering from corrosion of the rear wheel
arches by now, so be a little suspicious of one that does not show any signs of corrosion. If it has not been properly fixed, it will
probably re-appear in a very short time. A receipt from a reputable body-shop would be good evidence that it has been
taken care of properly. Replacement front and rear wings are available from Toyota (approximately £120 and £450
respectively). Alternatively both the MR2 Driver's Club and the
MR2 Mk1 Club can supply replacement rear wheel arch and B-pillar/sill sections
for a lower cost.
- Pull up the lining in the rear boot and check for corrosion, as water can collect here and be held against the boot floor by
the lining. Check that the floor is not buckled indicating accident damage. Now remove the hardboard covers at each side of the
rear boot and shine a torch down at the rear wheel arches. This will give you a good indication of how corroded they are, even if
they appear good on the outside.
- If the vehicle is a T-bar, it is advisable to check these for leaks. If possible, drench them with water from a hose and then
check inside for drips and damp spots on the seats and floor.
- Floor pans are prone to corrode, pull up the carpets in the cabin to check and/or have a good feel underneath the car (although
the plastic underbody protector panels will prevent too much access from underneath).
- There should be a nice MR2 Eagle badge on the bonnet. These are often stolen and replacements are in excess of £30 from Toyota!
Engine
- The "16 Valve" inscription on the cam cover (top of the engine) should be blue for pre-1987 models, and red for post-1987 models.
1987 models themselves can be either, as this was when the engine was changed slightly, and the inscription colour changed from blue
to red. Bear in mind though that this has not been confirmed by Toyota, and some cars may have had an engine transplant during their
life.
- Another way to check the engine type is by checking the air temperature sender. On the early engines
it is a yellow sensor screwed into
the intake plenium just to the rear and right of the TVIS label, on the
later engines it is plugged into the intake piping under the resonator box.
- Everything in the engine bay should be a bit dirty, be cautious of sparkling steam cleaned examples as the seller might be
trying to hide something! Look for obvious oil leaks around the engine block. Be sure to check for oil leaks underneath
too. If the engine has been replaced at some point, pay particular attention to the seal between the oil sump and the engine block.
The distributor o-ring can often leak, and is cheap to fix, so do not worry unduly about a small leak here running down
the front face of the engine.
- The oil sump can corrode excessively and/or be damaged by grounding to the point where holes develop. Expect some surface corrosion
but give it a good tap all over to look for weak spots.
- Open the oil filler cap on the cam cover. Only oil should be present - if there is any cream coloured gunge present then
water has found its way into the oil system, possibly due to a blown head gasket. If there is just a little gunge, it could just be
caused by the car not being used much recently, particularly if the weather has been cold and the car has not been driven on long
journeys. Check the dipstick too. Hopefully all the oil will
be relatively clear indicating a recent oil change. The dipstick can be difficult to locate - it is low down in the engine bay on
the right rear corner of the engine block close to the coolant recovery tank and alternator belt.
- Find the throttle cable which is supported on a tripod-type bracket on top of the engine. Check the ends are not frayed.
- The cambelt should have been changed at 60,000 mile intervals. If this has been done by a Toyota dealer (or by the owner or independent
garage using a Toyota supplied belt) they should have attached a
sticker that is supplied with the belt to the top of the cambelt cover with the date and mileage of the change written on.
- Check the exhaust for corrosion - standard mild steel exhausts corrode quickly when used for lots of short journeys. Replacement
stainless steel systems with a lifetime warranty often cost only a little more than the standard mild steel Toyota item which is
only warrantied for three years.
Cooling System
- Check the radiator area for leaks. These can be from the radiator itself, from the bleed valves on the radiator or from the
pipes connected to it.
- Toyota recommend that a special Toyota coolant (called ForLife) be used.
The correct ForLife for the Mark 1 MR2 is a dark red colour
- check for the presence of dark red coolant in the coolant recovery tank at the rear offside of the
engine bay. You must take the cap off the tank
and look inside to do this as the tank gets stained by the coolant so it may always look full from the outside even if the
tank is empty. Also check in the cooling
system itself by removing the pressure cap situated on piping just forward of the recovery tank (taking appropriate precautions).
The level should be up near
to the top of the filler neck. If the level is so low that no coolant is visible in the pipe under the filler neck then be
very wary as the owner might have run it like this for some time causing damage due to airlocks and overheating.
If the coolant is pale red then
it has probably been diluted with water to compensate for a leak somewhere. Other coolants are fine too, as long as they are a good
ethylene glycol type, so you may find green or blue coolant instead. If just plain water is in there, then you may well be looking
at an expensive engine or coolant system repair bill in the near future.
Rusty or dirty coolant is also a sign that the car has not been cared for
very well as it would appear that the coolant has not been replaced regularly.
- If the coolant recovery tank cap is cracked, replace it to avoid sucking air back into the cooling system rather than coolant
(and hence causing airlocks). The original caps
are white, the more durable replacements from Toyota are black.
- Look across the bulkhead behind the coolant recovery tank - there should be an even film of
road grime across here. If the bulkhead area immediately behind the coolant
tank is streaked or stained, assume that the engine's been overheated
recently. If this area is suspiciously cleaner than the rest of the engine
bay, somebody's tried to clean up the evidence!
Test Drive
- When starting from cold it is now normal for the engine to idle at around 2000rpm or so. A little disconcerting at first. This is
caused by a waxstat in the cold start system degrading over time and allowing too much air through. New ones are in the
order of £100 from Toyota.
- Take it easy to let everything warm up, then check the heater to make sure it can blow hot air (and hence there is not an
airlock in the heater area of the cooling system).
- Cooling system airlocks are common, due to a lack of understanding of the MR2's complex cooling system.
Watch for overheating and clouds of
steam in the rear view mirror! Another indication of air in the system is a 'bouncing' engine idle when cold caused by air pockets
passing the coolant temperature sensors and fooling them and the ECU. If the car exhibits any of these problems then it is probably
best to walk away because if it has been run in such a condition then it may well have overheated and head gasket failure could
be imminent.
- The oil pressure guage should read about half way when idling, and somewhere around 3/4 when at higher revs.
- Clunks and bumps from the front of the car over potholes probably mean worn anti-roll bar droplinks, worn bushes, worn tie-rods,
or worn steering rack could also be the cause.
- It should be pretty easy to select all the gears (remember to check reverse!). Fifth gear can be a good sign of worn gearbox
components. Severe wear will result in it jumping out of 5th and into neutral, particularly when backing off the throttle. You can
test this by driving as fast as possible and lifting off the throttle quickly, letting the car slow somewhat and then jumping back on
the throttle quickly. If it jumps out of 5th then there is obviously a problem. If it stays in gear check how much movement of the
gear lever there is when backing off the throttle. Ideally there should be very little. Anything more than around 20mm is a sign of
significant wear and you could expect to be replacing the gearbox in the near future.
- Check the brakes by again building up speed and then applying them sharply (consider other road users before doing this!). The
car should not pull to either side.
- If there is judder as the brakes are applied from high speed (try and test this at speeds at or greater than 60mph) then the
front brake discs are probably warped and need replacing together with the pads. This is a common problem on early Mk1s and was
corrected in later models by the use of larger front discs.
Once it's yours
If you follow the above then you should end up with a pretty sound motor! Here are some tips on getting started with your new pride and joy:
- You may well find that the owner's handbook has been lost over time, and UK dealers cannot supply replacements. However, the
MR2 Driver's Club import new ones from America. There are some
differences between US and UK cars, but they are minor and do not detract from the usefulness of the handbook.
- Haynes only released a Mark 1 MR2 workshop manual in the US. You can order one online in the UK from the
Haynes website. They are also stocked by the
MR2 Driver's Club
and the MR2 Mk1 Club. There are some
differences between US and UK cars, but they are minor and do not detract from the usefulness of the manual. Similarly, it is for the early
(1985-1987) cars, but the later cars only differ slightly, so again the manual is still very useful for owners of later cars.
- Toyota workshop manuals are available if you want more detail than the Haynes manual. UK dealers are not able to supply them, but they
can be obtained through the UK MR2 Driver's Club. They sometimes come up for auction on
eBay too.
- If you have a sunroof car, you might be surprised to know (unless you have the owner's handbook!) that the sunroof can be removed
fully and stowed in the front boot! Follow the instructions on the driver's sun visor to remove it, then clip the handle back into the
closed position. Now stow it in the front boot
by hooking the metal tabs at the front of the sunroof under the rubber covered tabs at the rear of the front boot, and resting
the sunroof handle on the cream coloured rest at the front of the front boot (you may need to unlock the clips). Now secure the
sunroof handle with the clips and enjoy the fresh air!
- Sunroof cars should come complete with a sunroof shade that clips under the sunroof, and similarly t-bar cars should come complete
with two bags to safely store the t-bar panels. All of these commonly get lost over time - they sometimes come up for sale on
eBay.
- Cloth seats are more resilient than leather. Be prepared to clean and treat leather seats to keep them in top condition.
- To clean the headlamps or to replace the headlamp bulbs, lock the headlamps up by pushing the headlamp switch in and rotating it one stop
further counter-clockwise than the headlamp on position (indicated by a headlamp symbol with an up-and-down arrow next to it). Use this
if you expect water to have frozen overnight too (e.g. clear night after rainy day) - it'll save burning the motors out if the
headlamps are frozen solid!
- The wiper arms are only half length - the blades come complete with half an arm and are attached with two screws (as is the spoiler
on the driver's side blade). Aftermarket adapters are available but reportedly not too good. I bought a pair of new wiper blades
from Toyota for £35 (ouch!), but replacement rubber blades are available for a very cheap £3.50 or so,
and the Toyota parts person usually fits them for you.
- Treat the gearbox to some new transmission oil. Redline MT-90 is a favourite among MR2 owners in the UK and US - I certainly noticed
the difference with gearchanges being much smoother.
- If the coolant has not been changed for a while (or you have no indication of when it was last changed, or if it is a rusty colour)
then change it as soon as possible to prevent corrosion (especially of the expensive-to-replace pipes running from the engine bay to
the radiator). Make sure you bleed the system correctly afterwards. If you have it changed by a garage/dealer,
make sure they know how to bleed the system and make sure they do it. Details can be found in the Haynes manual, Toyota workshop
manuals, or have a read of the cooling system guide
I wrote
for the IMOC-UK. Even if you don't replace the coolant immediately it would be wise
to bleed the system so you know for sure there are no airlocks in the system.
- When it's time for the 120,000 mile cambelt change (or multiples thereof), replace the idler pulley too as it's usually on it's
way out at this point. You don't want to have to pay for the whole job again a few months later because it's failed.
- Have a four-wheel laser alignment carried out, complete with any adjustments that are required. If this has not been done for a while
you should feel a noticeable improvement in the handling and feel of the car. Expect to pay around £60 from an independent
specialist, and close to £100 from a Toyota dealer, plus a
little extra if some of the more unusual adjustments (such as to the camber) are required.
- The usual source of knocking noises from the front of the car when going over bumps is the anti-roll bar drop links.
Auto Japanese Spares sell pattern items for much less than Toyota
(along with other useful new and used Mk1 MR2 parts).
- Consider replacing the suspension bushes all round, because they will be pretty tired by now.
Fensport
sell Superflex bushes, a complete kit costing £145 (exc.VAT). Perhaps carry out this work when replacing the anti-roll bar droplinks.
- The 4A-GE engine in the Mark 1 MR2 is a hardy beast, but if something major does fail it will probably be more cost effective to
source a low mileage second hand Japanese import engine from the likes of Fensport
than to have it rebuilt. Don't forget to ask them about Supercharger conversions!
Credits
This guide was originally based on a checklist I put together for buying my Mk1 MR2 using material from a number of sources:
the buyer's guide on the
MR2 Driver's Club website formed the basis, to which I added a whole load of
material I had gathered over a few months of being subscribed to the IMOC-UK mailing
list. More recently I have added material from my experiences of owning a Mk1 MR2. Last but not least the following
have all provided invaluable information:
Jamie Ayres, Daniel Basterfield, Alan Head, Jimi Lawson, Tim Morton,
and Westfield Motors, Essex
Home >
MR2
Copyright |
Guestbook |
Links

 nick@challoner.com